/* Ravelry Shopping Cart */

Friday, August 17, 2012

Knitter's Magazine #108: Jubilee

Yippee, the first Fall oriented pattern of mine has just come out in the new Knitter's Magazine issue #K108 and it's called Jubilee! What a fitting name for this Fair Isle collar and cuff jacket. :D

© XRX, Inc.
It's a wonderful jacket to throw over your solid colored t-shirt or turtleneck and you are dressed to go.

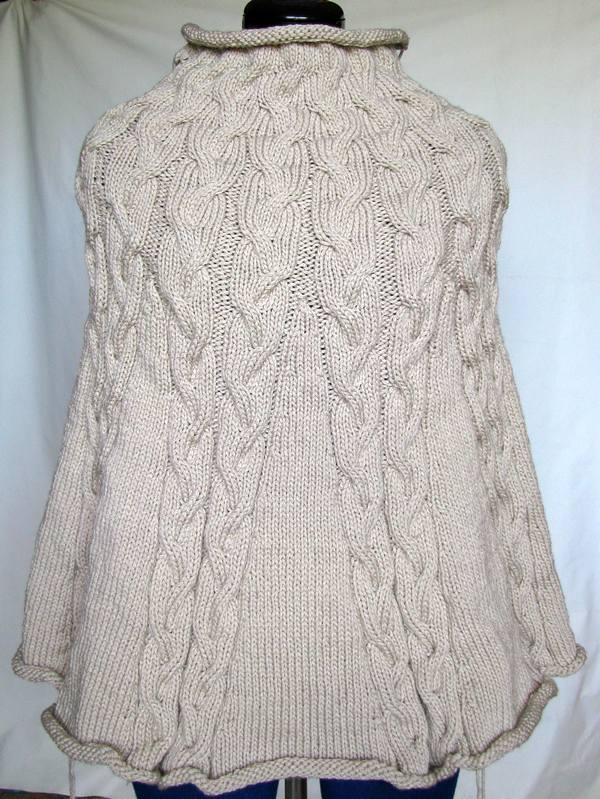
With this design I tried to do something different than the traditional placement of Fair Isle colorwork and used it for a wide collar and cuffs to steal the show of an otherwise slick, slightly shaped and classic cardigan.


Invisible shaping rows create a gentle curve in the collar


I absolutely LOVE how the Fair Isle collar turned out after incorporating 2 invisible shaping rows that don't interrupt the Fair Isle pattern and give the collar extra fabric to nicely curve around your back neck.
The bottom hem, collar and cuffs all have a "mouse tooth" edging and folded over lining for a clean finish. And the front button bands are knitted in together with the body.

Construction

The cardigan body is worked in one piece, from the bottom up to the armholes, then split into fronts and back.

The collar is knitted on and worked back and forth.

The sleeves are worked flat from the shoulder down, then joined to work the cuffs in the round.


 Yarn

I have to admit that this was the first time that I've worked with Cascade Yarns Cascade 220 and Cascade 220 Sport and I've enjoyed it quite a bit. It held up really well to my many unraveling sessions until I got the shaping and collar increases just right.

It's definitely a great fit for an outer layer like a cardigan and the colors are nice and rich. I will have to come up with a couple more designs of this very pleasant to knit with yarn.

Hope you will enjoy not only this pattern in the new Knitter's Magazine but also all the other inovative cardigans in this issue.

Happy Knitting!


Friday, August 3, 2012

Custom Knit: #396 Poncho by Bergere de France

Okay, I do knit a lot but that #396 is the pattern number and not my 396th custom knit, haha!

© Bergere de France

I was pretty excited when my friend Christine, owner of the CR.eations yarn shops in Ennis and Big Sky Montana, contacted me for a custom knit of this pattern because this was such a striking pattern that had already peaked my interest before she reached out to me.

And on top of it, I've worked with the Bergere de France Magic+ yarn already on a previous project and was pleasantly surprised by the 50% wool/50% acrylic fiber. It does NOT look or feel acrylic at all, is machine washable and has a wonderful drape. BTW, this is a thick worsted weight yarn and I would consider it of Aran weight.

I've made a couple of adjustments to the pattern:

  • Working in the round from the bottom up instead of two pieces that have to be seamed up, i.e. cast on 4 sts less for a total of 400 sts (size S/M) and eliminate the “k1” at the beg and end of the row instructions.


  • Changed direction of Stockinette stitch panel decreases to an ssk at the right edge and k2tog at the left edge so that they are less obvious.
  • Decided to work the “slip 2, k1, pass 2 sts over” instruction for the double dec to close out the St st panel as “slip 2 st tog as if to k2tog, k1, pass 2sts tog over” which will make the center st lay on top.
  • Worked the cuffs in the round and then sewed them to the bottom edge.
  • Used "Jeny's Surprisingly Stretchy Bind-Off" to finish the top.
It took me a little less than 2 weeks to knit this poncho besides my other commitments. It was a realy addictive pattern with me always wanting to knit just one more cable repeat, and one more, and one more..., and before I knew it, the body was done. :)

Plus it helped that there were less and less stitches as you moved up towards the neck.

Body is complete and only cuffs are missing
I've heard that the customer really liked her new hand-knit poncho and I had a fun time knitting this striking pattern.

Please feel free to contact me regarding custom knits as I do take some on from time to time (especially if it's an interesting pattern).

Friday, June 1, 2012

Paper Sewing - Large Heart

It's not easy to celebrate birthdays when you are far apart. I always struggle with it. Sure, a phone call and mailing a little something will bridge the distance a bit but spending time together to reminiscent, celebrate and laugh together is hard to beat.
Fadengraphik - Large Heart with 3 layers
So the best thing that I have found that sort of works for me, is to send my mom some time in the form of self-made cards and crafts. That way, I can show her that I am thinking of her not only on her special day but on many more days and hours throughout the year.

And I know that my mom will appreciate it because she is a major quilter and crafter herself. :)

For this card I used a technique called "Fadengraphik" (in German). I am not sure what the English term is but "paper sewing" might come close.

Card size: 6" wide and 7" tall

Main materials

MATERIALS:
Heart paper sewing template from: http://www.handcraftedgreetings.com/card.php?card_id=63
DMC thread in colors:  963 (light pink), 962 (pink), 902 (dark wine)
Sewing needles in 2 sizes (a small one and one a bit larger for punching holes)
Styrofoam piece for a soft surface
Heavy card stock from "DieCuts With a View" in Blue #3 (heart base) and Blue #2 (card base)
Floral print paper from "DieCuts With a View" called Purple Flowers
Basic white card stock paper (heart frame and label)
cellophane and double sticky tape
Font for label: Script MT Bold, size 28, bold

Before you can start sewing your design, you will need to punch the holes in the card. I placed my heart background on top of the Styrofoam piece and then placed the heart template over it to punch through both layers with the larger needle (use a thimble to protect your finger).

Punch holes through paper template

Then you start to sew the layers of the 3-layer heart by following the sewing instructions provided by the above template website.
Layer 1 complete; 2nd layer in progress
Back side with taped down thread beginnings and ends

Layer 2 complete; 3rd layer in progress
And you should end up with something looking like this:

All 3 layers finished
Then comes the fun part of playing around with different papers to find a combination and arrangement that suites your taste, cut, glue and print and your card is ready to be mailed off!

Thursday, May 31, 2012

Bead Knitting Hatband

My workshop teaching date (Thursday, June 7, 2012) for "Knitting with Beads" at this year's Estes Park Wool Market is coming closer and closer. The handouts are done and I am sorting out what beads and samples I should bring along for participants to touch, feel and explore. But as usual, my mind is running wild and comes up with more and more designs. I just can't keep up! :)


Bead Knitting Hatband
In this case, I was mulling over ideas for a sample that could showcase bead knitting (every stitch has a bead knitted through it, on both, RS and WS rows, so that the yarn doesn't show at all), a technique that was very popular during the Victorian time period when you would see some amazing bead designs for coin pockets or evening purses.

With bead knitting, no yarn shows

But I was looking for something more practical for our times and came up with this arrowhead/chevron design for a hatband. Here out West, the rodeo season is upon us and we ladies like to dress up in some sparkling Western wear. :)

It's a great little project to try your hand on bead knitting.

After deciding what beads to use (size 6/0 Czech glass beads in 4 colors)) and what kind of pattern I would like to see, it was a surprisingly quick project; about 30-45 minutes of pre-stringing the beads, ~4 hours of knitting, and ~20 minutes of sewing it to the hat. Definitely a good choice for a weekend project.

Brown #10 crochet thread and size 6/0 Czech seed beads in 4 colors.

And just to show you how my mind zooms off and gets ideas - for just a moment there, I thought, I saw a beaded rattlesnake emerge from the work in progress... do you see it too?

Doesn't this look like a little rattlesnake?
So, keep your eyes open and put down your knitting from time to time. You never know what you will find. :)


Wednesday, May 23, 2012

Apple Fruit Cozy

Another school year is coming to a close and it's time to figure out a little token of appreciation for my boys' teachers...


It's a little bit more complicated this year as our school district instantiated a law that allows teacher's gifts to be of a max. value of $25. So, no more pooling together money from the class to purchase a more substantial gift card or class gift. It might be considered a bribe! Even though these kids are leaving the teacher...

Good thing I'm a crafter! I zoomed over to Ravelry and started surfing patterns that could be potential gifts for teachers and I came across this really cute Pear Apply Cozy by Susan B. Anderson. Her blog entry has the actual knitting instructions.

I used Hobby Lobby's Yarn Bee Snowflake Wool Blend (color: #16 Caliope; 56% wool, 44% polyester) for the cozy and then added two leaves in Snowflake#5 Limelight, knit on US #3 (3.25 mm) needles.


The instructions for one leaf are:

CO 3 sts.
Work I-cord for about 1”.
Row 1 (RS): K1, yo, k1, yo, k1. 5 sts
Row 2 and all WS rows: knit.
Row 3: K2, yo, k1, yo, k2. 7 sts
Row 5: K3, yo, k1, yo, k3. 9 sts
Row 7: K4, yo, k1, yo, k4. 11 sts
Row 9: K5, yo, k1, yo, k5. 13 sts
Row 11: Ssk, k9, k2tog. 11 sts
Row 13: Ssk, k7, k2tog. 9 sts
Row 15: Ssk, k5, k2tog. 7 sts
Row 17: Ssk, k3, k2tog. 5 sts
Row 19: Ssk, k1, k2tog. 3 sts
Row 21: Sl1 kwise, k2tog, psso. 1 sts
Break yarn and weave in.
Use beg yarn tail to sew I-cord to apple fruit cozy.

What a cute, useful and quick to make gift it is!